My partner came home from his run on Saturday with a box full of baby ducklings he'd rescued from certain death by cat. The mother duck was nowhere to be found. After ringing partner's mother and googling duckling care (the two best sources of information) the ducklings were homed in a large box (ex radio controlled plane). We used a lamp with the only old style incandescent bulb we had to keep them warm and fed them up on chick feed begged from neighbours who keep chickens.
This worked well for a couple of days until I got to thinking of a more efficient way to keep them warm...
A while ago I'd built a heated bed for my Ultimaker 3D printer following a design similar to this one. Mine had stripboard soldered in parallel in sets of four then those sets wired in series to give and overall resistance of about 3.5 Ohms. I sandwiched the board between the glass from the door of a small bench top oven (with thermal paste) and some wool insulation and MDF board on the other side.
With 19 V across the stripboard, the glass surface could reach 230 deg C after a long warm up time (20+ minutes) and was controlled by the provided circuit on the Ultimaker board. It worked, but was mostly unused as I mainly print in PLA and I got better at the tricks to make prints stick to the original unheated acrylic bed.
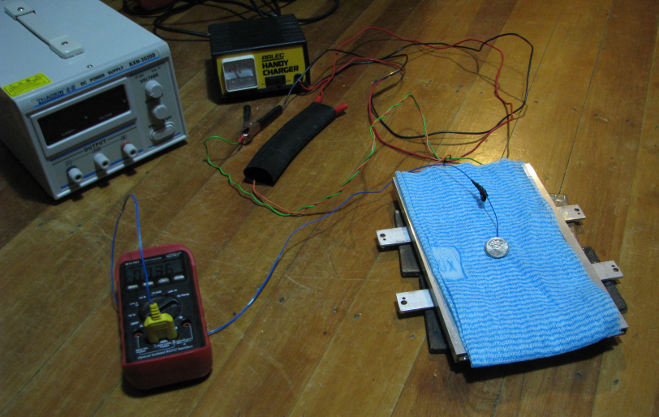
So this looked perfect for a new use. A bit of experimenting with a controlled voltage power supply and a thermocouple showed I could get a consistent 30 to 35 deg C temperature at a constant 6 V without any need for a control circuit. Perfect for our new fosterlings. I swapped a car battery charger for the fancy power supply, wrapped the bed well in fleece (ducklings are messy) and installed it in the ducklings' box. After a day of duckling satisfaction testing we built an insulated enclosure over half the bed to provide them with a choice of a warmer enclosed space.
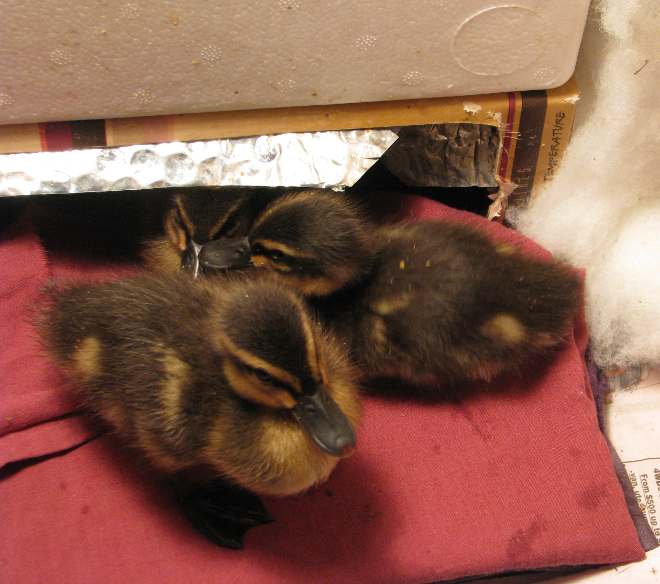
Result, Happy Ducklings.